I haven't felt like turning on the oven, because it's SO HOT OUTSIDE that it's even hot inside. You know what I mean? Yeah, you know what I mean.
I am not a huge fan of pasta salad, or cold dishes in general, but this stuff is the best for all-purpose summer eating. I make a big bowl of it, stick it in the fridge, and it sits there getting better and better the longer it chills. I bring it to work for lunch, or serve it with chicken or fish for supper, or just snack on it whenever.
IT IS SO EASY. HERE IT IS:
Garden Rotini Pasta - the pretty colored spiral stuff. It boils up quickly (don't overcook it, it should be firm - 9-11 minutes tops), and you can turn the stove off afterwards. You are DONE with the stove. Give the pasta a good rinse in cool water and let it drain while you cut up veggies.
Tomatoes - cherry tomatoes are the best, but I've been using the big fresh tomatoes mom gave me from her garden. They're a little juicy for pasta salad, but I slice them, then pat the slices dry with a paper towel before dicing them. Keeps the mess out of the bowl.
Zucchini - one or two whole zucchini - leave it raw and don't bother peeling it. I slice mine down the center long-ways, then slice it into half-circles. Toss 'em in the bowl.
Black Olives - if you're into those. Slice 'em up, toss 'em in.
Parmesan - I like the shredded kind that comes in the little tubs in the cheese section of the store. I've been using that stuff on EVERYTHING lately.
Greek Vinaigrette Dressing - or Italian dressing, if you can't find Greek. I way prefer Greek, but I'm a picky dressing snob.
Salt and Pepper (and a Little Shake of Tony's)
MIX, STIR, SEASON TO TASTE, CHILL IN FRIDGE, EAT.
Oh. And sometimes I squeeze a lemon in there. Most times.
Showing posts with label veggies. Show all posts
Showing posts with label veggies. Show all posts
Blackened Chicken Caesar Salad
Summer on a college campus is wonderfully quiet and spacious, but the food sucks. After finals, most of the on-site restaurants close or offer limited menus, because thousands of hungry college kids are off bothering someone else for a couple months.
But what about my salads?? The coffee bar upstairs in the library sells salads at lunch during the semester. MY SALADS HAVE DISPPEARED for the summer and I'm kind of freaking out about that.
To the store! Get some:
* Chicken breast
* Parmesan cheese (the little tubs of shredded in the fridge section, not the canisters of grated in the pasta aisle)
* Big, fat croutons
* Caesar dressing
* A lemon
* Butter (or oil, if you just want to pan cook your chicken like normal. I'm BLACKENING it!)
* A bunch of seasonings -OR- one really good everything seasoning (like Tony's or Matt's)
* LETTUCE N STUFF
Laziness Disclaimer: I have a recipe for homemade croutons. I'm not doing that. They sell those in bags. Also, I'm sure there are 50,000 recipes online for fresh Caesar dressing made from local organic hand-picked Caesars, but I bought Kraft.
The main thing here is the chicken. You're gonna thaw out some chicken breast, and cut it up into chunks. You're gonna put those chunks in a bowl and squeeze a couple of lemon wedges all over them. Toss them around in that lemon juice. Mmm.
Now sprinkle them with seasoning. That Matt's stuff that Dad has is....it's...oh god it's amazing. Use that. If you don't have that, improvise with whatever you have in your pantry that would make a good all-purpose seasoning mix. You definitely want some black pepper, cayenne pepper, and garlic powder in that mix. Sprinkle lovingly on chicken and toss it all around.
Melt some butter - melt some in a little cup or bowl in the microwave (set that aside), then heat up a skillet to medium-high and melt another big, fat pat of butter in there. When the skillet is nice and hot, turn on your stove vent (!) and throw some chicken down. It's gonna sizzle and steam. Let it sit there and sear/blacken for a bit on one side, then - before you flip it over - drizzle a little fresh butter (from the bowl you set aside) over the topside, and hit it with another shake of seasoning. FLIP.
Drain your chicken - which should be a nice brown color on the outside with maybe a few little crusty black bits, and juicy-juicy on the inside! - pat it down with paper towels, whatever makes you feel better about using butter. Slice it into strips or cut it into cubes.
Toss your favorite greens (I went romaine, shredded iceburg, baby spinach) with fresh parmesan. Top with chicken chunks and croutons. Drizzle with Caesar dressing. I threw a few little grape tomatoes in with mine.
[Some kind of ending pun here, like "Hail Caesar!" or something, but less lame.]
Chicken Pot Pie...Biscuit...Casserole...Thing
This is in my recipe collection as "Chicken Pot Pie," but it's not actually a CHICKEN POT PIE. It's a variation thereof. A cheap, casseroled-out, biscuity-topped variation. Not a pie at all. It's...well, here:
CHICKEN POT PIE, KIND OF
1 lb chicken (whatever kind, I use skinless breasts because I don't care)
1 medium onion, chopped
2 stalks celery, chopped
1 can chicken broth
1/2 cup milk
1 can cream of mushroom soup (if you also don't care, otherwise you can substitute for this!)
Roughly 3/4 cup whatever fresh, canned or frozen vegetables you want to get rid of:
Carrots!
Peas!
Green beans!
Butter beans/lima beans!
CORN!
Bisquick mix (or your favorite brand of all-purpose baking mix) and milk to mix it with. OR you know. Your favorite homemade biscuit recipe, but - and I can't overstate this enough right now - I don't care.
To start, throw all the veggies in a pot of water and simmer them for like 20-30 minutes until they're cooked and tender. This recipe is excellent for getting rid of the last few vegetables in the bag, or cans that are about to expire. I add a pat of butter in with mine because...butter tastes good.
While the vegetables cook, chop the chicken into little chunks. Season to taste. Heat oil in a pan and brown them up. Pretty standard stuff. Remove the chicken and set it aside. I just go ahead at this point and put it in the bottom of a casserole dish.
Add the onion and celery to the empty chicken pan, and cook until the onion is translucent. Stir it all around from the bottom to get the flavor of the chicken bits left in the pan!
Next - cream of mushroom soup. Chicken broth. Milk. I don't have exact amounts for you, I'm so sorry. Start with 1/2 can of the broth, and 1/2 cup of milk, and work your way from there. Use your SKILL and PERCEPTION to decide if it's thick enough. If it's not, add a couple pinches of flour. Maybe you have too much chicken and veggies and not enough of this weird gravy to cover it all in the casserole dish? That happened to me! Add another can of mushroom soup, or more broth. You can cook, you got this.
If you don't want to use the soup, you can remove the onion/celery, make a quick flour/butter roux in the pan, and thicken it with the broth/milk mixture. That's up to you. The ultimate goal here is just to make a creamy chicken gravy to pour into the casserole dish. It does not have to be amazing.
POUR IT OVER THE CHICKEN IN THE CASSEROLE PAN. Drain your veggies when they're done, and stir them into the mix as well. PARTY IN YOUR BAKEWARE.
In a separate bowl, make some Bisquick mix. (OR HAND-MAKE BISCUITS, but that's ridiculous for a Thursday night. Community is about to start.)
My recipe literally says that. "Make some Bisquick mix." Well...okay? I used the "Biscuits or dumplings" recipe on the side of the box - I think it's 2/3 cup milk + 2 1/4 cups Bisquick mix. I did that TWICE because my casserole ended up being ENORMOUS. Fine. Did I mention I really don't care?
If you feel fancy, add a little sage to the biscuit mix for a nice subtle flavor. The sage in my pantry expired in 2010, did you know that?
You're going to top this casserole drop-biscuit style. Just plop 'em on there. They make a neat sound!
Preheat oven to 375. Stick this vat of food in there and cook it until the biscuit dough isn't raw and gross anymore. Like, I don't know, 30-40 minutes or so.
Eat it. Bring leftovers to work. Eat it again the next night. Bring more leftovers to work. I'm not kidding, I made WAY too much of this stuff.
It tastes great, though. And I totally DO care about that.
Stuffed Pistolettes
This is a rambling post about how I changed one of my favorite old recipes to make it happier. And it tastes good!
First, pistolettes. If you can't find a bread item called "pistolettes" where you are, just use some other big, fat yeast rolls with a sturdy crust. Anything hardy enough to hollow out and stuff will work just fine. (Ignore that that link describes them as "fried" - they are not bought fried. They are often fried as a method of cooking them, but we're not doing that.)
I prefer whole wheat pistolettes when I can find them, but the Winn Dixie by my house had a bag of 8 white pistolettes on sale for $0.99 the other day. EXCITING. I didn't want to spend any more than that on dinner, so I decided to substitute about half the old recipe with things I already had at home. Let's see how that went...
In the original recipe, you hollow out the rolls, stuff them with a meat/broccoli/cheese mixture, and bake them. We're still doing that, but we're changing the stuffing mixture. We're making it healthier and tastier.*
The original mixture for the stuffing goes like:
Ground beef
Broccoli
Velveeta
Cream of mushroom soup
Cooked white rice
Okay. The first thing we're doing is scrapping the rice. We've already got bread, which is plenty of starch. I image the rice was meant to make this meal stretch farther to feed more people cheaply? We're just a little family, though. And we're watching our carbs.
Next, cream of mushroom soup? I'm fresh out. But I do have a can of mushroom pieces and some milk. And some shredded sharp cheddar cheese instead of Velveeta...because. Just because. You know why.
I ALWAYS keep ground beef and broccoli florets in my freezer. Always have. Always will.
So here's what! Brown the ground beef. I like to flavor mine up with salt, pepper, Tony's, garlic and onion. It never hurts. Drain it.
You steamed some broccoli while you were doing that? Good. Chop it up small, small and throw it in with the beef. Also add in some (drained) canned mushrooms. Stir, stir. Drain it one more time if your veggies cook out a lot.
At this point, I dumped the meat and veggies into a big bowl and put the pan back on the heat. I threw in a little bit of butter (about 1.5 tbs) and melted it, then added the same amount in flour (about 1.5 tbs) to make a quick roux base for the cheese sauce. Stir the roux around until it's pasty, then slowly add in some milk. I don't know, like...1/2 cup? 3/4 cup? I was not measuring at this point. I was ROLLING WITH IT.
Stir and cook it like that until it starts to steam and thicken, then add in some cheese. Again - and you know you love me - I have no idea how much cheese. Maybe 1 cup. Maybe more. Just stir and taste, stir and taste. Season it, if you like! Salt and pepper. I'm sooo tired aaaalll of the time.
Once you don't hate your cheese sauce, dump in the meat and stir everything around. It needs to not be too soupy. It needs to be thick and cheesy and kind of...gluey. Add more cheese until it does that.
NOW you can hollow out your rolls, stuff them to bejesus, and brush the tops of the rolls with a little melted butter. Pop them in the oven (preheated to 400) for about 15-20 minutes. They will be crusty and buttery on the outside, and warm and gooey on the inside. They will fill you up and keep you that way.
THE END
* Note: this is not a healthy recipe, exactly, but I count removing the Velveeta as making it more healthy, so...whatever. DON'T YOU JUDGE ME.
Mom's Vegetable Soup
AHOY, SISTER-COUSIN!
So awhile back I was making all these promises about sending you the recipe for mom's vegetable soup! You know what I did instead? I sent it to a blog friend, but not you! I'm an awful, awful person! I guess because I wanted to write it to you separately, full of State quotes and inside jokes, but then I never got around to it.
(I cried when Marcel hung this piece. True story.)
I'm going to try to reword my notes into an actual recipe, so, hold on.
Vegetable (Beef) Soup*
(The beef can be left out, I guess. I leave it out of the title, so it sounds less like something they would serve you in the school cafeteria.)
1 lb. stew meat
1 onion, chopped
SOME BUTTER I GUESS
random amounts of water
1 14.5 oz can of diced tomatoes
2 sm. cans of tomato sauce (I have never seen a single person posses the big can of tomato sauce)
3 stalks celery, chopped
salt, pepper, Tony's to taste
2 - 3 potatoes, chopped
5 - 6 carrots, sliced (or frozen, my store doesn't have frozen sliced carrots, WTH)
Small frozen bags of corn, green beans, and butter beans
Melt the butter in a giant pot. Put the meat and onion all up in it, until the meat is just brown. Add water to cover meat and onions plus about 1" over. Add diced tomatoes, tomato sauce, celery, and seasonings.*
Bring to a boil (Call me old fashioned; but I think fire is magic, and it scares me a lot.), cover and simmer for 30 minutes.
Add potatoes, carrots and simmer for 30 more minutes. (I will often think of you when I'm in less than pants.)
Add frozen vegetables. (I wouldn't wipe my ass with Billy's The Four Food Groups!) This is probably where you would add the spaghetti noodles if you are living in the Lofton house circa 1989. Your call. Bring to a boil again and then simmer, covered, for 15 - 20 more minutes.
EAT WITH GRILLED CHEESE (or cheese on toast, slightly melted in the microwave, which is how Mom and I do it SHUT UP KENDRA IT TASTES GOOD AND IS EASY.)
As you know it makes a shit-ton. As you know, my husband is just like our dad (who, your father?), so I had to freeze a lot for special Krista-meals when he's gone. It's like a tiny healthy surprise in my freezer! Right next to last year's Cadbury eggs and mango popsicles (you should try those, mmm).
Oh, hey, can Curt eat soup without making an ass out of himself? When can kids do that? (CHRISTOPHER MARLOWE WROTE ALLLLL MY PLAYS)
I LOVE YOU.
*it says TO TASTE, but do you REALLY want to taste at this point?
(I don't care about America, all I care about is sex and booze and pills!)
Chicken Teriyaki Bowl
I LOVE THIS RECIPE.
CHICKEN TERIYAKI BOWL
Part ONE:
Preheat the oven to 350. GO!
* 1 lb. cubed boneless chicken
* 1 large onion
Cut the chicken up however you want. Salt and pepper it. Roughly chop the onion into chunks. Toss both things in a casserole dish.
Part TWO:
Get a mixing bowl.
* 8 tbs soy sauce
* 3/4 cup sugar
* 1/2 cup vinegar
Stir it all together! Set it aside!
Part THREE:
Steam some vegetables.
* Broccoli (or whatever)
* White pepper
* Ground ginger
I don't care what kind of vegetables. I prefer to use fresh broccoli, but I've also used green beans, mushrooms and various frozen mixes. Whatever sounds like it would go good with teriyaki chicken, you know?
Toss the veggies around with about 1/4 cup of the teriyaki sauce mixture (in the bowl, that you put over there on the counter), and a sprinkling of white pepper and ginger. To taste. Cover and steam in the microwave, or whatever. However you usually steam vegetables.
Pour the REST of the teriyaki sauce aaaallll over the chicken and onion in the casserole dish. Stick it in the oven for about an hour.
Part FOUR:
* Rice
Make rice. I like white rice with this dish, but brown rice probably is fine.
While the rice cooks, check on the chicken a few times while it bakes. Use a big spoon to baste the chicken with the juices as it cooks to make sure it is JUICY and AWESOME.
Part FIVE:
Rice goes in a bowl. Chicken and onion go in the bowl. Vegetables go in the bowl.
Food goes in your face. SO, SO GOOD.

Not super photogenic, but SO GOOD.
CHICKEN TERIYAKI BOWL
Part ONE:
Preheat the oven to 350. GO!
* 1 lb. cubed boneless chicken
* 1 large onion
Cut the chicken up however you want. Salt and pepper it. Roughly chop the onion into chunks. Toss both things in a casserole dish.
Part TWO:
Get a mixing bowl.
* 8 tbs soy sauce
* 3/4 cup sugar
* 1/2 cup vinegar
Stir it all together! Set it aside!
Part THREE:
Steam some vegetables.
* Broccoli (or whatever)
* White pepper
* Ground ginger
I don't care what kind of vegetables. I prefer to use fresh broccoli, but I've also used green beans, mushrooms and various frozen mixes. Whatever sounds like it would go good with teriyaki chicken, you know?
Toss the veggies around with about 1/4 cup of the teriyaki sauce mixture (in the bowl, that you put over there on the counter), and a sprinkling of white pepper and ginger. To taste. Cover and steam in the microwave, or whatever. However you usually steam vegetables.
Pour the REST of the teriyaki sauce aaaallll over the chicken and onion in the casserole dish. Stick it in the oven for about an hour.
Part FOUR:
* Rice
Make rice. I like white rice with this dish, but brown rice probably is fine.
While the rice cooks, check on the chicken a few times while it bakes. Use a big spoon to baste the chicken with the juices as it cooks to make sure it is JUICY and AWESOME.
Part FIVE:
Rice goes in a bowl. Chicken and onion go in the bowl. Vegetables go in the bowl.
Food goes in your face. SO, SO GOOD.
Not super photogenic, but SO GOOD.
Creamed Spinach Casserole, Corn Pudding, Cherry Cream Crumble Pie
Holy shit, you guys.
Holy shit.
Kendra, I bet when you signed in to write your own last couple blog posts you noticed I had this draft up. I was totally preparing to write this big spectacular post about what I make at Christmas time - and then I was going to post a recipe for every day leading up to Christmas.
Awesome, right?
Yeah, well. The internet was down at work ALLLLL WEEEEEEKKKKKK and when I get home I am too busy actually cooking these things to write about them, or stirring Hamburger Helper, or trying to take the frozen pizza out without putting down my Jack-and-Coke.
So I'm going to cram it all into two posts - one dedicated to our Christmas supper at Christy and Jay's, and one for the desserts I brought to my in-laws' house this past weekend.
Christy is not a cook. Seriously. She will straight up tell you, let me clean up your mess, but you do the cooking. So, alright. We sat down the Wednesday before our Saturday night dinner to plan what we were going to cook. A lot of our menu came from my cookbooks - including The Book, which if anyone asks, I'll let Kendra handle that particular question. The Book is overwhelming, to say the least.

Here is our menu:
Garlic Studded Pot Roast (only difference here is we do ours on the stove-top)
Creamed Spinach Casserole (pg 83 of the birthday edition of The Book)
Corn Pudding
Mashed Potatoes
Cherry Cream Crumble Pie (pg 266)
We also had rolls and old fashioned sweet potato casserole, which Christy did make. Good job, Christy!

Creamed Spinach Casserole
2 boxes or bags frozen chopped spinach, thawed
8 oz cream cheese, room temp
1/2 cup crumbled bacon bits
1 stick butter, melted
1 cup, plus 2 tbsp fresh shredded Parmesan
Mix all ingredients (except 2 tbsp cheese) in a greased casserole dish. Sprinkle the reserved cheese on top. Bake at 350 for 30 min or until bubbly.
(this was really, really good - but is GREASY. like when we took it out of the oven i was dubious. reheated, it smells really bad...but i'm not the biggest fan of cream cheese outside of desserts, or when i can straight up smell it. also: you had better like spinach)
Corn Pudding
30 oz frozen corn (changed from two 15 oz cans)
1/2 c. flour
1/2 c. sugar
1 tsp salt
1 c. egg substitute (this was initially a low fat/low cholesterol recipe that I revised - this is the only part I wasn't sure about. We ended up using like 4 eggs)
1 1/2 c. milk
Combine corn, flour, sugar, and salt. Pour into greased baking dish. In a separate bowl, mix egg and milk. Pour over corn but do not stir. Bake 45-50 min, stirring gently a few times during baking.
(This is really good, but VERY BLAND. Add salt and pepper and Tony's. Add some more.)
Cherry Cream Crumble Pie
Filling:
1/2 cup sugar
3 tbsp flour
2 15 oz. cans pitted tart cherries, drained
1 cup sour cream
1 egg, lightly beaten
1/4 tsp almond extract
1 unbaked pie crust
Topping:
1/2 cup quick cooking oats
1/3 cup flour
1/3 cup packed brown sugar
1/4 tsp ground cinnamon
1/4 cup cold butter
1/2 cup chopped pecans
Preheat oven to 400.
In a large bowl, combine the sugar, flour, cherries, sour cream, egg, and extract. Spoon into the pie crust, and bake for 20 minutes.
While pie is cooking, assemble ingredients for topping. Combine the oats, flour, brown sugar,and cinnamon in a bowl. Cut in butter until mixture is coarse and crumbly. Fold in chopped pecans.
After the pie has baked 20 minutes, remove from foil and crumble the mixture on top. Cover the edges of the crust with foil to prevent over-browning, and return to oven. Bake another 25-30 minutes, or until the topping has slightly browned.
Allow to cool for 1 hour before serving.
(ok - this is awesome. it's ugly at first because it's PINK but it comes out great. bring ice cream.)

MERRY CHRISTMAS from some people who don't know how to use a self timer!
Quick Note on Roasted Broccoli
I just found a tip for making (already delicious) roasted broccoli more delicious, and highly recommend it. I made some last night and it was perfection.
The post on Roasted Broccoli below (2 clicks down) has been updated to add the secret ingredient - SUGAR.
Because everything in the entire month of December must contain sugar.
The post on Roasted Broccoli below (2 clicks down) has been updated to add the secret ingredient - SUGAR.
Because everything in the entire month of December must contain sugar.
Roasted Broccoli and Peanut Butter Cake
Eat your vegetables, then you can have dessert.
_____________________________________
ROASTED BROCCOLI
• 2 bunches fresh broccoli (not frozen), chopped into florets (well dried)
• 4 fresh garlic cloves, sliced
• 5 tbs olive oil (about)
• Grated Parmesan (optional)
• Juice of ½ lemon (optional)
* Salt and pepper, to taste
* Pinch of sugar! (optional, but do it)
I have seen this recipe floating all over the internet, usually called THE BEST BROCCOLI IT'S POSSIBLE TO MAKE EVER IN THE WORLD. And it's actually true.
Toss the broccoli and garlic slivers with olive oil, salt and pepper - and sugar! I am updating this recipe to add the sugar. It helps to carmalize everything together and make it awesome-er. I use a nice hefty pinch, let's say about 1/4 - 1/3 tsp? Okay, I'm done now.
Spread it all out in a roasting pan or on a baking sheet, and roast at 400 degrees for 25 minutes - the tops of the broccoli should just be turning brown. Remove from the oven and sprinkle on lemon juice and Parmesan (if you're using those things). Toss everything well, and serve.
That's it! You can leave out the Parmesan, or the lemon juice, or both. Just make sure the broccoli florets are not too small (or they'll shrink up and get soggy) and that if you rinse them before you cook them - make sure you dry them completely. You don't want any water in there. Affects the roasting.
Make this broccoli. I asked Shayne if he liked it and got a "Yeah!!"
____________________________________
PEANUT BUTTER SHEET CAKE
• 2 cups sugar
• 1 tsp baking soda
• 2 cups flour
• 1 tsp salt
• 2 sticks butter
• 1 cup water
• 1 cup peanut butter
• ½ cup milk
• 1 tsp vanilla
• 2 eggs
For the frosting:
• 1 stick butter
• ½ cup peanut butter
• 6 tsp milk
• 1 lb powdered sugar
I can't remember where I found this recipe. It doesn't matter. It's exactly what I wanted. I halved this recipe, and used a small sheet cake pan. It was the perfect amount for two people to share for a few days. I also greased my pan with shortening and floured it first. You probably don't have to do that, but it makes me feel better.
In a large bowl, mix together sugar, baking soda, flour and salt. Set aside. Combine butter, water and peanut butter in a saucepan, and bring to boil. Pour peanut butter mixture into flour mixture. Add milk, vanilla and eggs. Mix everything together well (I just used a spoon, no mixers necessary). Pour the batter into a large (or small, if you're halving it) rimmed cookie sheet or jelly roll pan and bake at 400 for 20 minutes. Set the pan aside and let it cool.
To make the frosting, bring butter, peanut butter and milk to boil in a saucepan. Add one pound of powdered sugar and stir until completely incorporated. Pour warm frosting over cooled cake.
I didn't listen, and frosted the cake while it was still pretty warm. It was mostly fine, but the peanut butter makes the frosting kind of sticky and tacky - it peeled the top off the cake in places as I spread it. Not the most beautiful presentation.
Next time I make this, I'm going to try adding more sugar to the cake batter. Maybe some brown sugar. It needed just a little more kick of sweetness, but otherwise it was delicious. Even better the next day, cold from the fridge with some milk.
Yes.
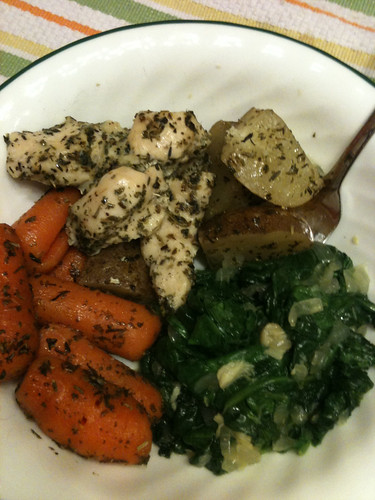
Rosemary Chicken
Behold! The only non-peanut-butter-sandwich meal we had at my house last week. I know Will has already tried and rejected the "grass" in this recipe, but dude. Will is five years old. This stuff is delicious. Uh...SO THERE.
Actually, this is not my boys' favorite thing to eat, either. But who's doing the cooking here? That's what I thought. Y'all know where we keep the peanut butter. Knock yourselves out. Mama needs her vegetables.
_________________________________________
Rosemary Chicken
• 1 lb. (or so) boneless, skinless chicken breasts, cut into chunks - or any kind of chicken will do here, honestly
• 1 small package baby carrots - or large carrots chopped into chunks, whatever
• 2-4 small potatoes, chopped into chunks (optional, if you're watching starches)
• Olive oil
• Rosemary, thyme and oregano
• Salt, white and black pepper
• 1 large oven bag (these are in the Ziploc/tin foil aisle)
• 1 tbs flour
Just a note: It's probably fine if you don't have an oven bag, just seal everything up in tin foil and bake it like that. I always use an oven bag, because it's neat and tidy and easy. Oven bags! Yay! But whatever works for you, man.
Shake 1 tbs of flour around in a large oven bag. It says to do this on the oven bag instructions. It's weird, but it helps it...not...explode? I honestly don't even know. Just go with it. Discard the excess flour. Lay the bag out flat in a large roasting pan. You're going to fill it with awesome in just a minute.
In a large Ziploc bag, toss the carrot and potato chunks with a little olive oil to coat them - about 1 tbs should do. Shake in some rosemary, thyme, oregano, and white pepper. The amounts are up to you - this recipe can use up a lot of your precious herbs (which aren't the cheapest thing in the world, I know) so use your own judgment. As long as all the veggies are sprinkled with disgusting grass evenly, you're doing fine. (Tell Will I said hi!)
Transfer the veggies from the Ziploc bag to the oven bag, and spread them evenly out in the pan. Save that Ziploc bag.
Thaw and cut up the chicken into cubes or chunks, and add that to the Ziploc bag. Shake in the same herbs you used before, plus a little salt and black pepper. Honestly, this could just as easily be called Thyme Chicken or Oregano Chicken or just Herb Chicken, because you're not putting any more rosemary than anything else, you know? Or maybe you are. I'm not judging, just making an observation. You do what you want. Carry on.
Add the chicken to the oven bag with the vegetables, spreading everything around in the bottom of the pan evenly. Seal the oven bag with a twist-tie (they come in the oven bag box). Cut a few slits in the bag to allow steam to escape.
Bake at 350 for about 1 hour, or until the veggies are tender and the chicken is cooked through.
_________________________________________
This has become one of my favorite, healthiest, easiest, relatively cheapest, go-to weeknight recipes. I make it at least once every couple of months. I believe I got it from Carla. We were on one of our walks around the parade ground and she was telling me about a dish they cooked at her house, and this was (more or less) it. Hey, Carla, did I get it right??
I served this with sauteed spinach, because I thought it complimented the chicken and veggies really well. I have already posted (at ridiculous length) about the spinach, here: http://sistersupper.blogspot.com/2010/06/spinach-101.html
BUT I WILL POST IT AGAIN. And clean it up a little.
_________________________________________
Roasted Garlic Spinach
• 1 bag baby spinach leaves (or about 1 - 1 1/2 lbs)
• 1-2 tbs olive oil
• Small diced onion
• 4-6 cloves garlic
• Salt and pepper, to taste
Lop the ends off the garlic cloves. Coat them in olive oil, wrap them in foil, and bake at 425 for about 20-25 minutes, or until they're tender. Unwrap them and let them cool a little bit, then you can POP them out of their skins and mash them. They should pop out very easily.
In a skillet or large-ish saucepan, heat the olive oil and add the onion and roasted garlic. Sautee until the onion softens. Start adding in spinach by handfuls, stirring each handful until it's wilted enough to make room to add more. Keep adding spinach until you're happy with the spinach/onion/garlic ratio. Salt and pepper it. Stir it around. Taste it. Salt and pepper it some more if it needs it.
The end.
A BOWL OF LAWN TRIMMINGS
Shepherd's Pie
First, HAPPY BIRTHDAY. :)

I made shepherd's pie last night. You are the reason I learned how to make it. Do you remember calling me one time (or maybe you emailed?) asking if I knew how to make shepherd's pie? And I did not. And you were sad, because you were craving it. A friend's mom used to make it for y'all, and it was delicious and you hadn't had it in years and years. So (I think, if I remember) we both went hunting for recipes and this is what we came up with. Did you ever make some?
I did. And I've made it several times since. And I will make you some any time you want!
_______________________________________
Shepherd’s Pie
• 1 lb ground beef
• 1 onion, chopped
• 1 clove garlic, chopped
• 1 small can sliced mushroom (optional)
• 1 can whole kernel corn, drained
• 1 can sweet peas, drained
• 1 packet French onion dip mix (dry)
• Salt, Tony’s, black pepper, and white pepper, to taste
• Brown gravy (from jar or mix)
• Mashed potatoes (either instant or homemade)
• Shredded cheddar cheese
Brown the ground beef over medium heat. Season with salt, pepper and a packet of French onion soup mix - just dump the whole packet in dry and stir it around. Drain the can of mushrooms (or you can wash some fresh ones and slice them up, whatever), and add mushrooms, garlic, and onion to the beef. Cook until onion is translucent, then drain the pan.
Drain the corn and peas. Or you can use frozen! I use cans for this, because it's easier for me. (And I only ever buy the "No Salt Added" canned veggies, don't worry!) Anyway, add corn and peas to the meat and keep on stirring it around until it's all warmed through.
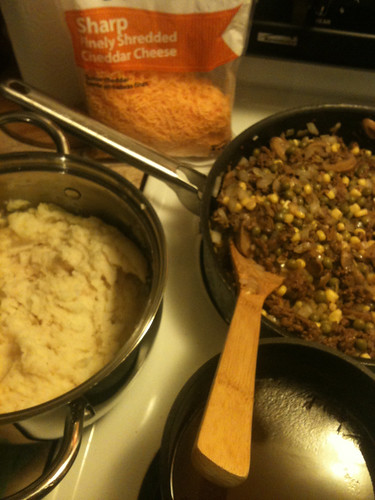
WHILE you are doing all that to the meat, you can also juggle the potatoes and gravy. I had three burners going on the stove at the same time, and this was a quick meal to make that way.
In separate pots, whip up some instant mashed potatoes and some brown gravy, according to package directions. See, you can totally zone out here. I say go ahead and use instant mashed potatoes, because hello. You are hungry. You're in a hurry. It's been a long day. But if you want to make it homemade, that's noble and sporting of you! Krista has a great recipe for that!
I don't really know what to tell you for the gravy. Unless you have some leftover beef tips or something, you're going to want a gravy mix. There are all kinds, but I use Tony's roux mix. It's very easy to make - just whisk 2 tablespoons of roux mix with 1 cup cool water over medium heat in a saucepan. I made 2 servings of it, so...4 tablespoons of mix, 2 cups of water. Oh, and for the potatoes, I used the directions for 8 servings. There were some potatoes left over, but it's okay, Curt ate them.
Anyway, however you choose to make potatoes and gravy happen, please do so now. I always hit the gravy with a little white pepper, and the potatoes with some Tony's (or seasoned salt of choice). Taste and see for yourself what you want to season with, or if you even do. It's all going to come together in one baking dish here soon anyway.
Enjoy this dark and unfocused picture
SPREAD THE MEAT MIXTURE INTO A BAKING DISH. (See?) Pour the gravy in and carefully mix it all around. You'll have to eyeball the amounts here. Sometimes I make too much gravy and it won't all fit in the dish without slopping over. And you don't want the meat/gravy mixture to fill the dish all the way to the brim, because you still need room up top for the potatoes. One time I made so much of everything I had to use 2 casserole dishes. You can do that, too! If you want to double this recipe, go for it. Get one of those aluminum casserole pans and freeze one of them for later, even.
Spread mashed potatoes over the top of the meat mixture. This is going to be kind of messy. It will not look beautiful. Who cares? Top the whole mess with cheese! Put the casserole dish on a sturdy baking sheet to catch drips (mine ALWAYS drips, ugh). Bake at 350 for 30 minutes, or until the cheese is melted and it’s bubbling around the edges.
Supreme. Comfort. Food.
I made shepherd's pie last night. You are the reason I learned how to make it. Do you remember calling me one time (or maybe you emailed?) asking if I knew how to make shepherd's pie? And I did not. And you were sad, because you were craving it. A friend's mom used to make it for y'all, and it was delicious and you hadn't had it in years and years. So (I think, if I remember) we both went hunting for recipes and this is what we came up with. Did you ever make some?
I did. And I've made it several times since. And I will make you some any time you want!
_______________________________________
Shepherd’s Pie
• 1 lb ground beef
• 1 onion, chopped
• 1 clove garlic, chopped
• 1 small can sliced mushroom (optional)
• 1 can whole kernel corn, drained
• 1 can sweet peas, drained
• 1 packet French onion dip mix (dry)
• Salt, Tony’s, black pepper, and white pepper, to taste
• Brown gravy (from jar or mix)
• Mashed potatoes (either instant or homemade)
• Shredded cheddar cheese
Brown the ground beef over medium heat. Season with salt, pepper and a packet of French onion soup mix - just dump the whole packet in dry and stir it around. Drain the can of mushrooms (or you can wash some fresh ones and slice them up, whatever), and add mushrooms, garlic, and onion to the beef. Cook until onion is translucent, then drain the pan.
Drain the corn and peas. Or you can use frozen! I use cans for this, because it's easier for me. (And I only ever buy the "No Salt Added" canned veggies, don't worry!) Anyway, add corn and peas to the meat and keep on stirring it around until it's all warmed through.
WHILE you are doing all that to the meat, you can also juggle the potatoes and gravy. I had three burners going on the stove at the same time, and this was a quick meal to make that way.
In separate pots, whip up some instant mashed potatoes and some brown gravy, according to package directions. See, you can totally zone out here. I say go ahead and use instant mashed potatoes, because hello. You are hungry. You're in a hurry. It's been a long day. But if you want to make it homemade, that's noble and sporting of you! Krista has a great recipe for that!
I don't really know what to tell you for the gravy. Unless you have some leftover beef tips or something, you're going to want a gravy mix. There are all kinds, but I use Tony's roux mix. It's very easy to make - just whisk 2 tablespoons of roux mix with 1 cup cool water over medium heat in a saucepan. I made 2 servings of it, so...4 tablespoons of mix, 2 cups of water. Oh, and for the potatoes, I used the directions for 8 servings. There were some potatoes left over, but it's okay, Curt ate them.
Anyway, however you choose to make potatoes and gravy happen, please do so now. I always hit the gravy with a little white pepper, and the potatoes with some Tony's (or seasoned salt of choice). Taste and see for yourself what you want to season with, or if you even do. It's all going to come together in one baking dish here soon anyway.
Enjoy this dark and unfocused picture
SPREAD THE MEAT MIXTURE INTO A BAKING DISH. (See?) Pour the gravy in and carefully mix it all around. You'll have to eyeball the amounts here. Sometimes I make too much gravy and it won't all fit in the dish without slopping over. And you don't want the meat/gravy mixture to fill the dish all the way to the brim, because you still need room up top for the potatoes. One time I made so much of everything I had to use 2 casserole dishes. You can do that, too! If you want to double this recipe, go for it. Get one of those aluminum casserole pans and freeze one of them for later, even.
Spread mashed potatoes over the top of the meat mixture. This is going to be kind of messy. It will not look beautiful. Who cares? Top the whole mess with cheese! Put the casserole dish on a sturdy baking sheet to catch drips (mine ALWAYS drips, ugh). Bake at 350 for 30 minutes, or until the cheese is melted and it’s bubbling around the edges.
Supreme. Comfort. Food.
Fried Okra Succotash
I have been craving this for weeks.
As you know, I got this recipe from Mom (and/or you?) after y'all went to Branson that one time. I actually found the Silver Dollar City recipe if you're interested! They use squash, which is...interesting. I read up on the origins of succotash (because I AM A BIG NERD), and found that it traditionally contains - and actually is centered around - lima beans. But let's not call them lima beans, because they are butter beans. Since that's what succotash mostly is (a butter bean dish), I decided to throw some into mine.
Except...Shayne doesn't like butter beans. So I cooked a separate pot of beans and mixed them into my bowl, and let him do his own thing.
YAY vegetables. If it weren't for the fried okra, this would be the healthiest food in my regular meal rotation. If it weren't for all the butter.
_____________________________________________
Fried Okra Succotash
• 1 lb chicken breast, cut into small pieces
• 2 tbs olive oil
• 1-2 cans corn, drained (or equivalent in frozen corn)
• 1 bell pepper, chopped (or frozen bell pepper, that works too)
• 1 onion, chopped
• 2 cups frozen butter beans (lima beans)
• Frozen breaded okra (you can slice and bread your own, but come on now)
• Oil for frying
• 2-4 tbs butter or margarine
• Salt, pepper and Tony's - to taste
Cover the butter beans with water in a small pot, and bring it to boil on the stove. I like to throw a little chopped onion and a couple spoons of butter in the pot to flavor them up. Also, salt and pepper. Stir them every now and then, and keep them at a low boil - not too high, not too low, just bubbling happily on the stove while you do everything else.
Pour some oil into a frying pan and heat it nice and hot - you'll want a few inches for deep frying. Even better, maybe you have a Fry Daddy. This is one of the only things I use my little Fry Daddy for (the other is onion rings, and sometimes chicken strips), but I LOVE HAVING IT for this. Easy, easy, easy. Anyway. Heat some oil until it's frying-hot.
Now you'll want a big deep skillet or everyday pan. Coat the bottom with a little oil, heat it over medium high heat, and brown the chicken. Season with salt, pepper and Tony’s. I don't know if it's me or what, but I always have to drain chicken juices out of the pan as it cooks down. I don't know. Remove the chicken from the skillet when it's done, and set it aside.
Add some butter to the skillet, and the corn, green pepper, and onion. Stir often, until the frozen veggies are thawed and cooked, and the onion is softened. Season with salt and pepper. Add more butter if you want! Let it simmer all together while you fry the okra. If your beans are softened, now is the time to drain them and stir them in with the other veggies. If you're doing that. I just left mine on the stove and stuck a serving spoon in the pot.
Fry the breaded okra (you don't even have to thaw it, just fry it straight out of the freezer bag) and drain on paper towels. Sprinkle on some salt, so you will die faster of inevitable heart disease.
Now this part is kind of important - take the veggies that have been simmering in all that beautiful butter, and drain them. Drain them well. Because you're about to mix in the okra, and you don't want the fried coating to get soggy. Drain the veggies, remove from heat, and dump in the okra. Stir it around gently until everything is mixed together.
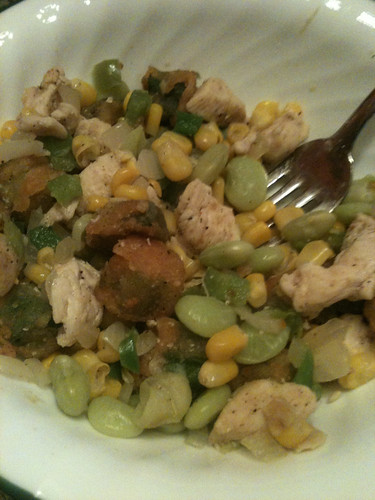
That's what I'm talking about. Fresh, delicious, nutritious - all that jazz - while still sneaking in a fried food.
As you know, I got this recipe from Mom (and/or you?) after y'all went to Branson that one time. I actually found the Silver Dollar City recipe if you're interested! They use squash, which is...interesting. I read up on the origins of succotash (because I AM A BIG NERD), and found that it traditionally contains - and actually is centered around - lima beans. But let's not call them lima beans, because they are butter beans. Since that's what succotash mostly is (a butter bean dish), I decided to throw some into mine.
Except...Shayne doesn't like butter beans. So I cooked a separate pot of beans and mixed them into my bowl, and let him do his own thing.
YAY vegetables. If it weren't for the fried okra, this would be the healthiest food in my regular meal rotation. If it weren't for all the butter.
_____________________________________________
Fried Okra Succotash
• 1 lb chicken breast, cut into small pieces
• 2 tbs olive oil
• 1-2 cans corn, drained (or equivalent in frozen corn)
• 1 bell pepper, chopped (or frozen bell pepper, that works too)
• 1 onion, chopped
• 2 cups frozen butter beans (lima beans)
• Frozen breaded okra (you can slice and bread your own, but come on now)
• Oil for frying
• 2-4 tbs butter or margarine
• Salt, pepper and Tony's - to taste
Cover the butter beans with water in a small pot, and bring it to boil on the stove. I like to throw a little chopped onion and a couple spoons of butter in the pot to flavor them up. Also, salt and pepper. Stir them every now and then, and keep them at a low boil - not too high, not too low, just bubbling happily on the stove while you do everything else.
Pour some oil into a frying pan and heat it nice and hot - you'll want a few inches for deep frying. Even better, maybe you have a Fry Daddy. This is one of the only things I use my little Fry Daddy for (the other is onion rings, and sometimes chicken strips), but I LOVE HAVING IT for this. Easy, easy, easy. Anyway. Heat some oil until it's frying-hot.
Now you'll want a big deep skillet or everyday pan. Coat the bottom with a little oil, heat it over medium high heat, and brown the chicken. Season with salt, pepper and Tony’s. I don't know if it's me or what, but I always have to drain chicken juices out of the pan as it cooks down. I don't know. Remove the chicken from the skillet when it's done, and set it aside.
Add some butter to the skillet, and the corn, green pepper, and onion. Stir often, until the frozen veggies are thawed and cooked, and the onion is softened. Season with salt and pepper. Add more butter if you want! Let it simmer all together while you fry the okra. If your beans are softened, now is the time to drain them and stir them in with the other veggies. If you're doing that. I just left mine on the stove and stuck a serving spoon in the pot.
Fry the breaded okra (you don't even have to thaw it, just fry it straight out of the freezer bag) and drain on paper towels. Sprinkle on some salt, so you will die faster of inevitable heart disease.
Now this part is kind of important - take the veggies that have been simmering in all that beautiful butter, and drain them. Drain them well. Because you're about to mix in the okra, and you don't want the fried coating to get soggy. Drain the veggies, remove from heat, and dump in the okra. Stir it around gently until everything is mixed together.
That's what I'm talking about. Fresh, delicious, nutritious - all that jazz - while still sneaking in a fried food.
Middle East EXTRAVAGANZA
You know I have mad love for what we call down here "Greek and Lebanese" food. I don't know what other places call it, but it's Middle Eastern food and it does things with flavors that I didn't know you could legally do. I had never had any of it until I was in my 20s, but when I finally did taste it, I wanted to marry it. It was a real revelation.
I also thought these flavors HAD to be created by professionals, in restaurants, with special equipment and knowledge that I could never be allowed to possess. It was too much. I would never be able to handle it.
BUT GUESS WHAT. I found recipes for all my favorites, and have been coveting them, biding my time until I could finally make them. Which was this weekend. And I made them ALL. I'm not even going to get into a whole thing here, I'm just going to throw the recipes at you and stand back. HERE, CATCH:
______________________________________________
HUMMUS
• 1 can (16 oz) chickpeas – drained, but liquid reserved
• ¼ cup liquid from can of chickpeas, or more as needed
• 3-5 tbs lemon juice, or more to taste
• 2 tbs tahini
• 2 cloves fresh garlic, crushed (or 3 cloves, roasted)
• ½ tsp salt, or more to taste
• 1-2 tbs olive oil, or more as needed
• Dash of white pepper, black pepper, curry powder, or other any other seasonings, as desired
Okay, the tahini. That was a little harder to find than I expected. I suggest you check the fancier grocery stores, as Wal-Mart and Winn Dixie just looked at me funny when I asked for it. Look for a store with a good looking international aisle. We have an Oak Point grocery nearby, they are my go-to place for "weird" stuff. Anyway, you'll be looking for a thick-looking beige paste in a jar. The one I got was about $8 for a jar, but there's enough in there to make it worthwhile. Most of these recipes only call for a few tablespoons at a time.
You can also make tahini by toasting a few cups of sesame seeds, letting them cool down, then blending them in a food processor with a cup or so of olive oil. I don't have a food processor, and I never have that many sesame seeds on hand, so I didn't get to try that one.
Anyway!
Drain the liquid from the can of chickpeas into a bowl, and set aside. In another bowl, whisk the lemon juice and tahini together. Slowly add the reserved chickpea liquid (1-2 tbs at a time) until the mixture is creamy and forms very soft peaks.
Pour the lemon/tahini mixture into a food processor (or blender, if you're me). Add the garlic, and start adding in the chickpeas in batches, about ¼ can at a time. Add in the olive oil, and maybe a little more of the chickpea liquid to keep the blades turning. Add as much oil/liquid as you need, or as much as you want to thin the hummus to your liking.
When all the chickpeas are added and the consistency is how you want it, taste and adjust for seasonings. Add salt, and maybe some pepper or other spices. I used a little white and black pepper, and thought it was fine just like that.
Pour the finished hummus in a serving bowl, and create a dent in the center. Pour in a few spoonfuls of olive oil, and dust the top with curry powder, or you can garnish it with parsley, lemon zest or sesame seeds if you want.
I will tell you this - how much do you like garlic? Because this whole meal used a lot of garlic, and I didn't realize how STRONG the cloves I was using were. MAN, that was some badass garlic. You might want to ease into it, and add a little at a time until it's where you want it. Since I could eat garlic until I breathe fire, I was happy with it! But I'd hesitate to serve what I ended up with to guests, you know?
Also, I don't have a garlic press, so every time a recipe calls for "minced or crushed garlic" I want you to picture me smashing some garlic with a hammer (not a cooking mallet - a HAMMER) on my counter. Because that's what I did.
Very therapeutic. Moving on.
______________________________________________
CUCUMBER SAUCE (TZATZIKI)
• 16 oz (2 cups) Greek yogurt (or plain, full-fat yogurt, strained to thicken)
• Several garlic cloves, minced or crushed - to taste (WHAM WHAM WHAM)
• 1 large cucumber, peeled and de-seeded/hulled
• 1 tbs olive oil
• 2 tsp fresh lemon juice
• 1-2 tbs chopped dill
This stuff takes a little prep work. EDIT: also, if I were making this for a single meal again, I'd halve the recipe. 2 cups is a lot of this stuff!
If you can’t find Greek yogurt, use plain yogurt, and strain it through a fine mesh strainer for an hour or so beforehand. I just sat my strainer over a bowl, poured in the yogurt and let it sit in the fridge while I prepped a bunch of other stuff. I was amazed how much water came out of it!
Peel the cucumber and slice it in half down the middle, lengthwise. Scoop all the center part with the seeds out, and pat the halves very dry with paper towels. Use a zester or fine cheese grater to grate it very fine. I'm not going to lie - it's weird to grate a cucumber. There's so much water in there that it's like most of it melts away. When you get it grated, you'll have a little pile of watery pulp. Strain or press the pulp as dry as you can get it - I just squeezed a couple fistfuls of it in my hand over the sink, honestly. As long as you end up with no standing liquid and a finely grated pulp, you're fine.
Combine the oil and lemon juice in a medium bowl. Fold the thickened yogurt in slowly, mixing it completely with the oil. Add the garlic, according to taste, and the cucumber and dill. Stir until everything is evenly distributed, and refrigerate at once. The flavors will meld better if refrigerated for a few hours before serving. (But I ate some right out of the bowl after it was freshly made and it was good!)
This stuff is very good on lamb gyros (which I did not cook), and falafel. WHICH I DID.
______________________________________________
FALAFEL
• 1 can (16 oz) chickpeas – drain, but reserve the liquid
• Onion, to taste (about ½ large onion or 1 small one)
• 2-3 cloves fresh garlic
• Fresh parsley, to taste (a handful or two)
• 1 tsp ground cumin
• 1 tsp ground coriander
• 3-5 tbs flour (or more, as needed)
• Salt to taste
Add all ingredients – except the chickpea liquid – to a food processor (OR BLENDER?), and blend well. If the blades have trouble turning (and if you use a blender, THEY WILL), add in some of the chickpea liquid to help. If you add the whole can of liquid (I DID), the batter will be very thin and will not form balls. You can still work with it, but it will be messier. ASK ME HOW I KNOW THIS.
If the batter is firm enough to roll into balls, great! Do that. If the batter is runny, like mine was, you can put it in a strainer and stick it in the fridge for a while to try to thicken it up some. When that fails to significantly help, then you can just say "Screw it," and drop it by spoonfuls into the grease.
Either way, heat about ½ inch oil in a frying pan over medium high heat. When it's hot enough to fry in, DO A TEST RUN WITH YOUR BATTER. Add in a rolled ball (or a dropped spoonful of batter) - does it completely disintegrate? Oh, no. That happens sometimes. Add more flour to your batter and stir it around real good. Try again until the batter holds together and behaves itself. Then you can add in more falafel! - but don't crowd the pan too much.
Fry the patties for a few minutes on each side, until they're brown. If you're working with the runny batter, be careful not to disturb the patties while they cook. They'll start off stuck to the bottom of the pan, but after they brown on that side, they'll lift up easily and you can flip them carefully with tongs. Also, don't make the patties too big or the centers will be mushy. This was a real learning experience, hoo boy.
Drain well on paper towels. Then stick 'em in a pita pocket and dress them up with hummus, tzatziki and veggies.
______________________________________________
One more time! This one had to be marinated overnight, so I made the marinade and sauce when I made everything else, but we ate it the day after. With the leftover hummus and tzatziki. It was perfect.
ChICKEN SHAWARMA
• 2 lbs boneless skinless chicken breasts
For the marinade:
• 10 cloves garlic, minced (I used jarred for this, that's a lot of garlic to hammer)
• 2 lemons, juiced
• ½ cup olive oil
• 2 tsp curry powder
• 1 tsp salt
• 2 tsp black pepper
For the sauce:
• 1-2 cloves garlic, minced or crushed (WHAM BAM BAM)
• 1-2 tbs tahini
• 1 cup cool water
• ½ cup lemon juice
• Salt, to taste
To make the marinade, whisk the garlic, lemon juice, and oil together in a large sealable bowl. Add the curry powder, salt and pepper, and whisk to combine. Cut the chicken into small pieces or strips (I did mine just like fajita meat), and add the chicken in with the marinade. Toss to coat well, and seal it up to marinate overnight (8 hours) in the refrigerator.
To make the sauce, add garlic and tahini to a food processor, and pulse to combine. Add cold water a little at a time (1/4 cup at a time, up to 1 cup), until the sauce is thinned and frothy. Add lemon juice, and mix until creamy. Season with salt, to taste. You can add more tahini if you want it thicker, but it doesn’t have to be a thick sauce, and you won’t need lots of it. You only need enough to lightly toss the chicken in, like a vinaigrette-type salad dressing.
You can make this sauce ahead of time and refrigerate it alongside the chicken, but return it to room temperature (or warm it in the microwave? I didn't try that) before tossing with the finished chicken. You don't want your finished chicken to be cold on the outside.
When it’s time to cook the chicken, grill it on a grill (if you have one) or cook it in batches in a hot skillet (which is what I did - again, very much like I do fajitas). Cook each side until well browned and the center of each piece is cooked through. Toss the cooked chicken lightly in the sauce, and serve with warm pita bread and all the trimmings.
The original recipe I used (and I'm sorry, I don't remember the source for ANY of these recipes, they've been in my book for AGES) called for making like, five times the amount of sauce needed. I whittled it down some when I made it, but I still ended up with way, way too much sauce. I think the version I'm posting today will make the right amount, but I haven't tried these measurements yet. It's just my best guess. You might still have leftovers!
EDIT: also please note, this sauce could be entirely optional. Shayne was kind of freaked out that there was a sauce, since the chicken shawarma in restaurants doesn't seem to have it. Or theirs is different. I'm not sure which. Either way, I think he would have been pleased if I'd left it off. So whatever, YMMV.
______________________________________________
OKAY.
I know, that's a WALL of recipes. It's a lot to absorb. It's a weekend project to make it all at once. But again - the FLAVORS are so amazing I could seriously write epic poetry to this food. They all belong together. Group hug forever.
Things you will want on hand for this meal (or parts of this meal, even if you just make the hummus you will still want this stuff with it): cucumber slices, tomato slices, lettuce or spinach leaves, any other fresh crunchy veggies you can think of, and plenty of pita bread. I have a recipe for homemade pita that I'll try soon. But not this trip.
In closing, here's a picture of the falafel in a pita, with hummus and tzatziki.
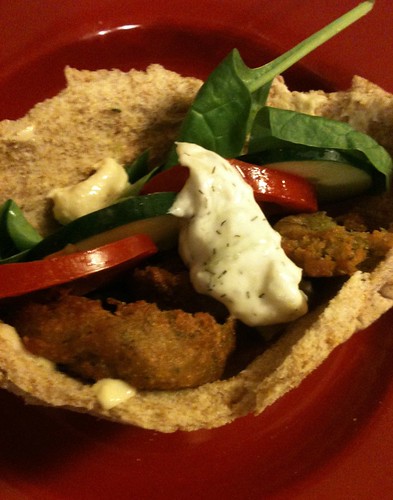
Alas, it perished about 3 seconds after this last known photo was taken.
I also thought these flavors HAD to be created by professionals, in restaurants, with special equipment and knowledge that I could never be allowed to possess. It was too much. I would never be able to handle it.
BUT GUESS WHAT. I found recipes for all my favorites, and have been coveting them, biding my time until I could finally make them. Which was this weekend. And I made them ALL. I'm not even going to get into a whole thing here, I'm just going to throw the recipes at you and stand back. HERE, CATCH:
______________________________________________
HUMMUS
• 1 can (16 oz) chickpeas – drained, but liquid reserved
• ¼ cup liquid from can of chickpeas, or more as needed
• 3-5 tbs lemon juice, or more to taste
• 2 tbs tahini
• 2 cloves fresh garlic, crushed (or 3 cloves, roasted)
• ½ tsp salt, or more to taste
• 1-2 tbs olive oil, or more as needed
• Dash of white pepper, black pepper, curry powder, or other any other seasonings, as desired
Okay, the tahini. That was a little harder to find than I expected. I suggest you check the fancier grocery stores, as Wal-Mart and Winn Dixie just looked at me funny when I asked for it. Look for a store with a good looking international aisle. We have an Oak Point grocery nearby, they are my go-to place for "weird" stuff. Anyway, you'll be looking for a thick-looking beige paste in a jar. The one I got was about $8 for a jar, but there's enough in there to make it worthwhile. Most of these recipes only call for a few tablespoons at a time.
You can also make tahini by toasting a few cups of sesame seeds, letting them cool down, then blending them in a food processor with a cup or so of olive oil. I don't have a food processor, and I never have that many sesame seeds on hand, so I didn't get to try that one.
Anyway!
Drain the liquid from the can of chickpeas into a bowl, and set aside. In another bowl, whisk the lemon juice and tahini together. Slowly add the reserved chickpea liquid (1-2 tbs at a time) until the mixture is creamy and forms very soft peaks.
Pour the lemon/tahini mixture into a food processor (or blender, if you're me). Add the garlic, and start adding in the chickpeas in batches, about ¼ can at a time. Add in the olive oil, and maybe a little more of the chickpea liquid to keep the blades turning. Add as much oil/liquid as you need, or as much as you want to thin the hummus to your liking.
When all the chickpeas are added and the consistency is how you want it, taste and adjust for seasonings. Add salt, and maybe some pepper or other spices. I used a little white and black pepper, and thought it was fine just like that.
Pour the finished hummus in a serving bowl, and create a dent in the center. Pour in a few spoonfuls of olive oil, and dust the top with curry powder, or you can garnish it with parsley, lemon zest or sesame seeds if you want.
I will tell you this - how much do you like garlic? Because this whole meal used a lot of garlic, and I didn't realize how STRONG the cloves I was using were. MAN, that was some badass garlic. You might want to ease into it, and add a little at a time until it's where you want it. Since I could eat garlic until I breathe fire, I was happy with it! But I'd hesitate to serve what I ended up with to guests, you know?
Also, I don't have a garlic press, so every time a recipe calls for "minced or crushed garlic" I want you to picture me smashing some garlic with a hammer (not a cooking mallet - a HAMMER) on my counter. Because that's what I did.
Very therapeutic. Moving on.
______________________________________________
CUCUMBER SAUCE (TZATZIKI)
• 16 oz (2 cups) Greek yogurt (or plain, full-fat yogurt, strained to thicken)
• Several garlic cloves, minced or crushed - to taste (WHAM WHAM WHAM)
• 1 large cucumber, peeled and de-seeded/hulled
• 1 tbs olive oil
• 2 tsp fresh lemon juice
• 1-2 tbs chopped dill
This stuff takes a little prep work. EDIT: also, if I were making this for a single meal again, I'd halve the recipe. 2 cups is a lot of this stuff!
If you can’t find Greek yogurt, use plain yogurt, and strain it through a fine mesh strainer for an hour or so beforehand. I just sat my strainer over a bowl, poured in the yogurt and let it sit in the fridge while I prepped a bunch of other stuff. I was amazed how much water came out of it!
Peel the cucumber and slice it in half down the middle, lengthwise. Scoop all the center part with the seeds out, and pat the halves very dry with paper towels. Use a zester or fine cheese grater to grate it very fine. I'm not going to lie - it's weird to grate a cucumber. There's so much water in there that it's like most of it melts away. When you get it grated, you'll have a little pile of watery pulp. Strain or press the pulp as dry as you can get it - I just squeezed a couple fistfuls of it in my hand over the sink, honestly. As long as you end up with no standing liquid and a finely grated pulp, you're fine.
Combine the oil and lemon juice in a medium bowl. Fold the thickened yogurt in slowly, mixing it completely with the oil. Add the garlic, according to taste, and the cucumber and dill. Stir until everything is evenly distributed, and refrigerate at once. The flavors will meld better if refrigerated for a few hours before serving. (But I ate some right out of the bowl after it was freshly made and it was good!)
This stuff is very good on lamb gyros (which I did not cook), and falafel. WHICH I DID.
______________________________________________
FALAFEL
• 1 can (16 oz) chickpeas – drain, but reserve the liquid
• Onion, to taste (about ½ large onion or 1 small one)
• 2-3 cloves fresh garlic
• Fresh parsley, to taste (a handful or two)
• 1 tsp ground cumin
• 1 tsp ground coriander
• 3-5 tbs flour (or more, as needed)
• Salt to taste
Add all ingredients – except the chickpea liquid – to a food processor (OR BLENDER?), and blend well. If the blades have trouble turning (and if you use a blender, THEY WILL), add in some of the chickpea liquid to help. If you add the whole can of liquid (I DID), the batter will be very thin and will not form balls. You can still work with it, but it will be messier. ASK ME HOW I KNOW THIS.
If the batter is firm enough to roll into balls, great! Do that. If the batter is runny, like mine was, you can put it in a strainer and stick it in the fridge for a while to try to thicken it up some. When that fails to significantly help, then you can just say "Screw it," and drop it by spoonfuls into the grease.
Either way, heat about ½ inch oil in a frying pan over medium high heat. When it's hot enough to fry in, DO A TEST RUN WITH YOUR BATTER. Add in a rolled ball (or a dropped spoonful of batter) - does it completely disintegrate? Oh, no. That happens sometimes. Add more flour to your batter and stir it around real good. Try again until the batter holds together and behaves itself. Then you can add in more falafel! - but don't crowd the pan too much.
Fry the patties for a few minutes on each side, until they're brown. If you're working with the runny batter, be careful not to disturb the patties while they cook. They'll start off stuck to the bottom of the pan, but after they brown on that side, they'll lift up easily and you can flip them carefully with tongs. Also, don't make the patties too big or the centers will be mushy. This was a real learning experience, hoo boy.
Drain well on paper towels. Then stick 'em in a pita pocket and dress them up with hummus, tzatziki and veggies.
______________________________________________
One more time! This one had to be marinated overnight, so I made the marinade and sauce when I made everything else, but we ate it the day after. With the leftover hummus and tzatziki. It was perfect.
ChICKEN SHAWARMA
• 2 lbs boneless skinless chicken breasts
For the marinade:
• 10 cloves garlic, minced (I used jarred for this, that's a lot of garlic to hammer)
• 2 lemons, juiced
• ½ cup olive oil
• 2 tsp curry powder
• 1 tsp salt
• 2 tsp black pepper
For the sauce:
• 1-2 cloves garlic, minced or crushed (WHAM BAM BAM)
• 1-2 tbs tahini
• 1 cup cool water
• ½ cup lemon juice
• Salt, to taste
To make the marinade, whisk the garlic, lemon juice, and oil together in a large sealable bowl. Add the curry powder, salt and pepper, and whisk to combine. Cut the chicken into small pieces or strips (I did mine just like fajita meat), and add the chicken in with the marinade. Toss to coat well, and seal it up to marinate overnight (8 hours) in the refrigerator.
To make the sauce, add garlic and tahini to a food processor, and pulse to combine. Add cold water a little at a time (1/4 cup at a time, up to 1 cup), until the sauce is thinned and frothy. Add lemon juice, and mix until creamy. Season with salt, to taste. You can add more tahini if you want it thicker, but it doesn’t have to be a thick sauce, and you won’t need lots of it. You only need enough to lightly toss the chicken in, like a vinaigrette-type salad dressing.
You can make this sauce ahead of time and refrigerate it alongside the chicken, but return it to room temperature (or warm it in the microwave? I didn't try that) before tossing with the finished chicken. You don't want your finished chicken to be cold on the outside.
When it’s time to cook the chicken, grill it on a grill (if you have one) or cook it in batches in a hot skillet (which is what I did - again, very much like I do fajitas). Cook each side until well browned and the center of each piece is cooked through. Toss the cooked chicken lightly in the sauce, and serve with warm pita bread and all the trimmings.
The original recipe I used (and I'm sorry, I don't remember the source for ANY of these recipes, they've been in my book for AGES) called for making like, five times the amount of sauce needed. I whittled it down some when I made it, but I still ended up with way, way too much sauce. I think the version I'm posting today will make the right amount, but I haven't tried these measurements yet. It's just my best guess. You might still have leftovers!
EDIT: also please note, this sauce could be entirely optional. Shayne was kind of freaked out that there was a sauce, since the chicken shawarma in restaurants doesn't seem to have it. Or theirs is different. I'm not sure which. Either way, I think he would have been pleased if I'd left it off. So whatever, YMMV.
______________________________________________
OKAY.
I know, that's a WALL of recipes. It's a lot to absorb. It's a weekend project to make it all at once. But again - the FLAVORS are so amazing I could seriously write epic poetry to this food. They all belong together. Group hug forever.
Things you will want on hand for this meal (or parts of this meal, even if you just make the hummus you will still want this stuff with it): cucumber slices, tomato slices, lettuce or spinach leaves, any other fresh crunchy veggies you can think of, and plenty of pita bread. I have a recipe for homemade pita that I'll try soon. But not this trip.
In closing, here's a picture of the falafel in a pita, with hummus and tzatziki.
Alas, it perished about 3 seconds after this last known photo was taken.
Spinach Artichoke Dip
You inspired me. Friday night, as I was trying to decide what to do about dinner, it occurred to me that I had been putting off making this recipe for too long. It was never the perfect time. I don't have this, or I'm out of that. But after your last "Gatorade is close enough to orange juice" post, I decided to quit my bitching and just make it already.
The recipe was iffy. It didn't say how much of some ingredients to use, or how to prepare half of it. It assumed you could read its mind. It assumed you could wing it. SO I DID. I made it with what I had on hand, and fleshed out the recipe. I even wrote in some wiggle room for next time I make it.
________________________________
Spinach Artichoke Dip
1 package (10-16 oz WHATEVER YOU HAVE) frozen chopped spinach
8 oz cream cheese
½ cup chopped onion
2 cloves minced (or 3-4 cloves roasted?) garlic
4 oz mozzarella cheese
1 can (12-14 oz WHO KNOWS) chopped artichoke hearts, drained
1 stick butter
Salt, black and white pepper – to taste (what recipe doesn't use pepper? ridiculous. added.)
Oven temp: 350
Microwave spinach in an oven-safe glass dish, according to package directions (about 6-8 minutes, covered). THE RECIPE DID NOT TELL ME THIS NEXT PART, but definitely do it. I could eyeball it and see how crucial a step it is:
Drain well, and press dry. Seriously. I drained it, but I didn't press it. I should have pressed it. There was a hint of spinach water pooling in the bottom of my dip, and that can really DAMPEN (hahahaha) your experience.
Return spinach to casserole dish. Pepper to taste, and add a little salt – but sparingly. The other ingredients, plus any chips you eat with the dip, will add salt.
MEANWHILE. Saute onion and garlic in butter until clear. I only had half a stick of butter in the fridge, so I fleshed out the rest with margarine. I used minced garlic, but next time I will increase it. Or - no, next time I'll probably try it with roasted garlic instead, because roasted garlic is almost always better (to me). Also, I did not have a single onion in my house, so I dug way down in the bottom of my freezer and found some frozen onion. Not...ideal. But whatever. Fresh onion will give off much more flavor and fragrance, but heeeyyyy. Times like this are why I let a little bag of frozen onion live in my freezer.
Mix cream cheese and artichoke hearts with spinach (I thew the artichokes in a food processor, because I only had whole ones). Add butter and onion mixture. Adjust seasonings again, if you need to, and add more pepper or salt. Mix in a small amount of mozzarella cheese, and top with remaining mozzarella cheese. Bake at 350 for 20-30 minutes.
I didn't have 8 oz of cream cheese, but I had most of a tub of the whipped kind that I used for my cucumber sandwiches - so I dumped that in, and fleshed out the missing part with extra mozzarella. Voi-freakin-la, half an hour later we had some pretty good dip. Not incredible, like it could be if I did everything just right, but good enough for Friday night. A couple glasses of wine later, and it was even tastier.
Note: this made a pretty big batch, and because I used such a large package of spinach and not quite enough cream cheese, it was weighted to the spinach side of things. But I like that. I am usually disappointed if I go out and order the spinach artichoke dip, and it's mostly cheese. So, whatever floats your boat. Just be warned. Bring friends (not Will, he won't eat this JUST A GUESS), or cut the recipe in half, and adjust the veggie/cheese ratios to fit your taste.
I may even leave out the artichokes entirely next time, because you can also do that. And artichokes fancy it all up, but they're not my favorite thing to eat, you know?
We ate this with tortilla chips, but I really wanted pita chips, or those round bread crisps. That would have been awesome - but damn, those things are expensive.
Cucumber Sandwiches
I know, you're not a cucumber fan. But I'm going to just throw this out there for anyone else who might be. These are a tasty, light and relatively healthy summertime snack food. Muriel taught me to make them (I feel the need to always cite my source, lest anyone think I have an original idea in my head).
CUCUMBER SANDWICHES
1 large cucumber
Red wine vinegar
Dried dill weed
6 slices bread
2-3 tbs whipped cream cheese spread (or regular cream cheese, softened)
Lemon juice
This takes some prep work, but it's worth it. Either peel the cucumber, or score it all over with a fork (pierce the skin and drag the fork all the way down, and repeat until the whole cucumber is scratched and stripey - I believe this is to vent the skin so the marinade can get in).
Slice the cucumber very thin, and stick it in a Ziploc bag. Pour in a little red wine vinegar, to taste - I add just enough to give the cucumber something to sit in, I don't like to drown them - and sprinkle in some dill - again, to taste. I like to slather on the dill.
Shake the bag around to coat the cucumbers, then put the bag in the fridge for a couple of hours. I leave mine overnight. Every time I open the fridge, I flip the bag around, so the marinade has a chance to get all over the place.
When you're ready to eat them, take the slices out of the bag and lay them on a paper-towel lined plate. Pat them all over with more paper towels to completely dry them.
Grab some bread - the thinner, the better, but I just use regular sandwich bread and gently smash it down a little bit thinner. I'm still getting all the carbs (or all the whole grain nutrition, depending on how you look at it) but I feel daintier if the bread looks thinner. I also always use wheat bread, but whatever floats your boat.
Definitely cut off the crusts. Cucumber sandwiches should feel light and fancy. There. Doesn't that feel fancier?
In a little bowl, mix together some cream cheese, lemon juice, and a good sprinkling of more dill weed. Spread this mixture thinly on each slice of bread. The purpose of it is to provide a delicious barrier between the cucumbers and the bread, so the bread doesn't get all soggy. Now layer some cucumber slices on one piece of bread, and slap another piece of bread on top. In the spirit of fanciness, I cut mine in half, or even into 3 delicate little strips. MMM. Pinkies out!
These go very well with cherry tomatoes on the side, for some reason.
Sunday Bloated Sunday
Let's say you wake up on Sunday and decide to have bacon, eggs and biscuits for breakfast. You can go ahead and smear your biscuits full of apricot preserves or blackberry jam. You can go ahead and eat as much as you want - it's early! You'll work off all those calories in the course of the day. Well, maybe after a short nap you will.
Let's say that after your nap, you realize your green tomatoes are starting to go red and you should probably fry them if you're going to. It'd be shameful to waste them. So you fry some green tomatoes while the baby sleeps...
_____________________________________________
FRIED GREEN TOMATOES
This is the recipe I have in my book. I'm not even sure where I got it. I used more than 3 tomatoes, because I needed to use them up. I made a TON, and when my neighbor came over to give me more cucumbers, I returned their plate to them (the one they gave to me full of SPICE CAKE last week!) with some fried green tomatoes on it. I highly recommend having a good relationship with neighbors whenever possible, it's beneficial to all involved.) ANYWAY, is this how you do yours? DISCUSS.
3 medium green tomatoes
1/2 cup flour
1/4 cup milk
2 beaten eggs
2/3 cup dry bread crumbs or cornmeal (I used a mix of both)
1/4 cup olive oil
Salt
Pepper
Tony's (if you want!)
Cut unpeeled tomatoes into 1/2-inch slices. Sprinkle slices with salt and pepper, and let stand for 15 minutes. Meanwhile, place flour, milk, eggs, and bread crumbs in four separate, shallow dishes.
I did all that, PLUS I decided to salt and pepper my breadcrumbs, too. And I added Tony's all in my flour, like I do when I'm breading...well, anything. Must add more spicy, always.
Heat 2 tbs oil in a skillet on medium heat (I was using a dark skillet that drank up more oil than that, so your mileage may vary). Dip tomato slices in milk, then flour, then eggs, then bread crumbs. Fry the slices in hot oil for 4-6 minutes on each side, or until brown. Add more oil to the skillet as needed. Drain on paper towels, and season to taste with salt and pepper.
YUM. These were tasty and good. But I could only eat, like, two slices before I decided I was going to probably die. They are VERY heavy, rich and, well...fried. Enjoy in moderation! Pass some off to your neighbors.
I bet there's a lighter breading process that doesn't weigh them down so much, but I wanted to at least try it the old fashioned way before I go looking to modern it up too much. (I even briefly considered frying them in the leftover bacon grease before I came to my senses.)
_____________________________________________
WELL. Now you're pretty stuffed and uncomfortable, but it's cool. It's cool. You can have a light supper tonight, to balance things out. Maybe just a cucumber sandwich, or some spinach and a piece of fruit, or...oh wait. Fruit...there was something about fruit...some other produce to use before it goes bad. OH YEAH LEMONS.
I got a bag of lemons, and they are nice and ripe. Better use them, too. LET'S MAKE LEMON BARS!
Normally I don't care to make desserts - especially desserts that call for me to break out my electric mixer. I do it every now and then, but I don't love putting a whole lot of effort into sweets. For one thing, I don't have a huge sweet tooth, I'm more of a main dish type of girl. But the main reason is I DON'T NEED TO EAT THEM. Sugar + me = flying high and crashing hard. I feel awful when I'm recovering from a sugar binge. Like, for days. My body aches, I'm grumpy, I crave more sugar - it's worse than drugs.
WHO CARES, I made that recipe for lemon bars you posted! They were SO GOOD. I love lemon in any form (you know the yellow candies are always my favorite) but had never made lemon curd before. Now that I know how to do it, I'm a danger to myself. And others. Because guess what? I can't eat all those lemon bars. I hope my neighbors are home this afternoon.
Also: Ugh. UGH. Uuuuughhhh.
Tonight's dinner: tap water and regret.
_____________________________________________
EDIT: Oh man, I almost forget that I ALSO made the Pioneer Woman's Rosemary Rolls for dinner. They were awesome, obviously. The only problem I had was the rosemary kept falling off. I think if I had served them alongside a main dish, it would have been fine. But instead, I cut them open, stuffed them with ham and Swiss cheese, and made little delicious sandwiches out of them. Curt-approved!
And Crazy Horse-approved, too. We had to fuss at him for stealing the last bite of Curt's sandwich right out of his hand. Bad dog. (Smart dog, dog with good taste, but bad.)
And before anyone notices, yes rosemary is bad for dogs. But the piece he ate was scraped clean of rosemary and extra salt, for Curt's picky tastes. No creatures were endangered during dinner, except the ham. And it was too late to save him.
Can I Just...Real Quick...
I hate summer. I loathe it. The heat, the humidity, the bugs, the horror. Summertime has ONE redeeming factor. Let me show you it.
This is my lunch today. I'm posting it here to make myself jealous later, when I'm having something less fresh and beautiful:
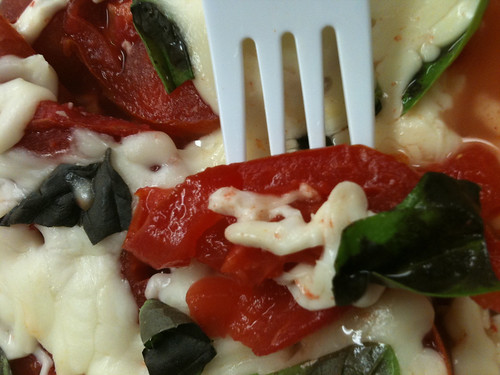
Tomatoes from Mom's garden, with mozzarella cheese and fresh basil, from your garden. I love you.
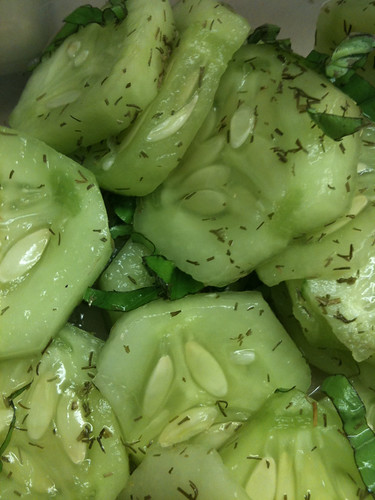
Cucumbers from my neighbor's garden (notice how everyone has a garden but me, because I am terrible) - I put a little salt, some dill, and yes more basil. Then I squeezed a lemon over the whole thing. So nice.
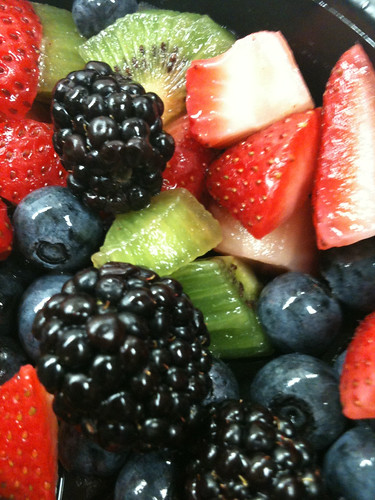
LOOK AT THAT. Mom gave me all this fruit, can you stand it?
I can't. I can't get over the variety of fruits and vegetables available to me in this miraculous modern age, and how I didn't grow or buy any of it myself (because I am terrible), it just CAME TO MY HOUSE, asking me to please eat it.
And that is why I won't complain about summer for at least several hours this afternoon.
This is my lunch today. I'm posting it here to make myself jealous later, when I'm having something less fresh and beautiful:
Tomatoes from Mom's garden, with mozzarella cheese and fresh basil, from your garden. I love you.
Cucumbers from my neighbor's garden (notice how everyone has a garden but me, because I am terrible) - I put a little salt, some dill, and yes more basil. Then I squeezed a lemon over the whole thing. So nice.
LOOK AT THAT. Mom gave me all this fruit, can you stand it?
I can't. I can't get over the variety of fruits and vegetables available to me in this miraculous modern age, and how I didn't grow or buy any of it myself (because I am terrible), it just CAME TO MY HOUSE, asking me to please eat it.
And that is why I won't complain about summer for at least several hours this afternoon.
Spinach 101
PLEASE NOTE: This is not a recipe. I've added a rough recipe to the bottom of this ridiculous post! This is me rambling about spinach and kind of half-ass telling you how I cooked some last night.
I'm having a thing with spinach right now. I've been buying the big salad bags of baby spinach leaves and basically stuffing them into everything.
It started with the smoothie. Mom called one day while Curt was over there and was bragging that she got my child to DRINK SPINACH. I was impressed. So I tried it myself. I made a basic smoothie (strawberry, banana, applesauce, and a dab of yogurt and milk for my dairy serving) and threw in some spinach. Dang. Who knew? It was delicious and I felt super good about everything the whole day.
So I've been making the spinach smoothies, eating spinach salads, sticking spinach into my sandwiches and - my favorite - having spinach and fresh tomato with my hummus and pita for lunch.
However, there is one thing I hadn't figured out. Cooking it. I mean, I've added it into omelettes before, and that's sort of like cooking it, but no. I mean, preparing straight up hot spinach as a meal or side dish. I never tried it. I had no interest in it before, because I never did like cooked greens. At least, I didn't think I did. This was an old grudge, from childhood - what kid likes the green stuff? (Not mine!)
Then I got a craving. There's this lunch menu special at Serrano's just off campus. I get it every time I go, because it's delicious. It's the "Pollo Asada" - a grilled chicken breast smothered in sauteed spinach and cheese. OH HEY. That's totally cooked spinach, and I love it. Let's start there!
Googling "pollo asada" led me nowhere. That apparently just means "roasted chicken" in Spanish, which isn't even a good description of what the dish is. You're right, Serrano's. I don't know enough Spanish to have caught onto that before, but it sure sounds authentic! I forgive you. Then I tried every variation of "spinach," "smothered" and "chicken" I could think of. Nada.
OH WELL, moving on. Gonna have to wing it. So last night, as I was roasting some green beans in the oven (yes, more sesame green beans, what?) I wrapped up a garlic clove (dipped in olive oil first) in a little piece of foil and roasted it, too. I took the roasted garlic clove (which smelled like heaven), and mashed it in an oiled skilled with some chopped onion, and stirred it all around a little bit. When the onion was softened, I went for it - I dumped in two big handfuls of spinach leaves and I cooked them.
EDIT: Salt and pepper! I also seasoned them with salt and pepper.
When the spinach was just wilted, I scooped it out (along with the garlic and onions) and transferred it to a small, one-person (ME ME ME) serving bowl. I topped it with Mozzarella and a sprinkle of Parmesan (because I don't have any Monterey Jack or Asadero on hand ever) and microwaved it to melt the cheese, and now I love cooked spinach forever.
Since this experiment worked, the next step is to top some chicken with it, and recreate that recipe. I found a good green rice recipe, which doubles as yet another great place to hide some spinach, AND a good use for spare cilantro.
Will report back on that.
--------------------------------------------------
SAUTEED SPINACH
1 ½ lbs spinach leaves (give or take)
2 tbs olive oil
Small diced onion (or half medium onion, let's say about 1/2 cup or so?)
4-6 cloves garlic
Salt and pepper to taste
Mozzarella and Parmesan (or Montery Jack and Asadero) cheese (optional)
Preheat oven to 425. Leave the skins on the garlic cloves, and just lop the very tips off. Coat the cloves in oil, wrap in foil, and bake 20-25 minutes until tender. I'm sure you can substitute regular minced garlic here if you're in a hurry, but I was trying to recreate the restaurant flavor, and that is roasted.
Wash and drain the spinach. When the garlic is done, remove from skin and mash.
In a saucepan, heat the oil and add the onion and garlic. Sautee until the onion softens. Add in spinach by handfuls, and stir until wilted. Remove from heat.
If you like, you can transfer to serving bowls and top with cheeses. Melt the cheese in the oven (if using oven-proof bowls) or microwave. Also makes an excellent topping for baked or grilled chicken, if you want to fancy it up into an entree.
Sesame Green Beans and Blackberry Cobbler
Okay, so you got me started on sesame green beans. You described them to me on the phone once, and I thought, "That sounds good." Buuuut, after we hung up, I couldn't remember exactly how you told me you do them. So I went online and looked up recipes. I found several different methods, but many of them called for sesame oil. "Sesame oil?" I said to my self, "I don't need any fancy-ass sesame oil." And it's true. I didn't. I made them without the sesame oil for a while, and they were great.
Then. One day I went to buy soy sauce, and there on the shelf was a little bottle of sesame oil. It was only a couple of bucks, so I decided to see if it really improved the recipe or not.
I highly suggest sesame oil.

SESAME GREEN BEANS (I know you already know how to do this, but HUMOR ME)
1 - 1 1/2 lb. fresh green beans, washed and trimmed
1-2 tbs. sesame seeds, toasted
1-2 tbs. olive oil
1-2 tsp. sesame oil
Salt, pepper and soy sauce to taste (I use low sodium soy sauce, hence the extra salt. If you use regular soy sauce you probably don't need more salt, but whatever floats your boat.)
Preheat the oven to 425, and heat up a skillet on the stovetop for toasting the seeds.
Wash and trim the beans, and toss them with olive oil on a foil-lined baking sheet (I guess it doesn't have to be foil-lined, I just always line mine) until they're nice and coated. Spread them out in an even layer. Roast them in the oven about 25 minutes, or until the tips start to brown a little bit.
Meanwhile, toast the sesame seeds in a small skillet. You are right - they POP when they get hot! It's kind of fun. Just stir them around until they are a pretty brown color and smell nice and nutty.
When the beans are done, just toss them with the sesame oil, sesame seeds, and seasoning. That's it!
I use tongs to transfer them to a serving bowl. I put about 1/3 of the beans in the bowl, then splash on a little soy sauce, salt and pepper, then a light drizzle of sesame oil and 1/3 of the toasted seeds. Then I take the tongs and kind of toss them around in the bowl to coat everything. I repeat this for the next 2 layers, and when all the beans and seeds have been added in, I toss everything one more time for good measure.
I can eat these things like candy. They are more addictive to me than sweet potato fries. In fact, I have made these and sweet potato fries together for supper before and just...completely ignored the main course. These are the best. Sesame oil.
Moving on.
That mulberry cobbler we (okay, you) made at Mom's a while back was really good, but it did not get the need for Grandma's house blackberry cobbler out of my system. I've had her recipe in my book for years. Like, a decade, actually. And I'd never made it before. Blackberries used to be out of my budget, but I recently found that I can buy them cheap-ish in the freezer section. GREAT VALUE BRAND. Yep. So I bought a couple bags and went for it.
GRANDMA-STYLE BLACKBERRY COBBLER
1 stick butter, softened
1 cup sugar
1 cup flour
2 cups (or so) blackberries
That's it. I used frozen blackberries, so I dumped them in a baking dish and warmed them up in the oven to thaw them before I put the topping on.
While they were thawing, I softened the butter a little in the microwave (like 15 seconds) and dumped it in a big bowl. Then I squished in the flour and sugar. It makes a gooey, sticky, crumbly, lumpy dough-type...situation. Very messy. Anyway, you crumble this over the blackberries and bake it at 350 for...let's say 35 minutes. I baked mine longer, because I kept waiting for the topping to get brown or crunchy or something. It didn't.
I don't know why it didn't, or if it's even supposed to? It's been THAT long since I've had Grandma's cobbler. I don't even remember what it's like.
Anyway, I was disappointed. I thought I screwed it up somehow, or I didn't have a complete recipe. Something didn't seem right to me. But I scooped some into a bowl and ate it warm out of the oven with a little dollop of vanilla ice cream anyway.
I did not screw it up! It tasted exactly as good as I remembered! It's the juicy kind of cobbler, maybe not your thing. But the juicy berry goodness, the crunch of the seeds, and the gooey almost-too-sweet dough holding it all together...awesome. Yes. Yay. This is the cobbler I'm sticking with.
I may try a few things in the future with it. I might try cutting the sugar down to 3/4 cup (it was very sweet) or maybe going 1/2 white sugar, 1/2 brown sugar. We'll see. I think I can do some kind of magic to it, I'm just not sure what yet.
Then. One day I went to buy soy sauce, and there on the shelf was a little bottle of sesame oil. It was only a couple of bucks, so I decided to see if it really improved the recipe or not.
I highly suggest sesame oil.
SESAME GREEN BEANS (I know you already know how to do this, but HUMOR ME)
1 - 1 1/2 lb. fresh green beans, washed and trimmed
1-2 tbs. sesame seeds, toasted
1-2 tbs. olive oil
1-2 tsp. sesame oil
Salt, pepper and soy sauce to taste (I use low sodium soy sauce, hence the extra salt. If you use regular soy sauce you probably don't need more salt, but whatever floats your boat.)
Preheat the oven to 425, and heat up a skillet on the stovetop for toasting the seeds.
Wash and trim the beans, and toss them with olive oil on a foil-lined baking sheet (I guess it doesn't have to be foil-lined, I just always line mine) until they're nice and coated. Spread them out in an even layer. Roast them in the oven about 25 minutes, or until the tips start to brown a little bit.
Meanwhile, toast the sesame seeds in a small skillet. You are right - they POP when they get hot! It's kind of fun. Just stir them around until they are a pretty brown color and smell nice and nutty.
When the beans are done, just toss them with the sesame oil, sesame seeds, and seasoning. That's it!
I use tongs to transfer them to a serving bowl. I put about 1/3 of the beans in the bowl, then splash on a little soy sauce, salt and pepper, then a light drizzle of sesame oil and 1/3 of the toasted seeds. Then I take the tongs and kind of toss them around in the bowl to coat everything. I repeat this for the next 2 layers, and when all the beans and seeds have been added in, I toss everything one more time for good measure.
I can eat these things like candy. They are more addictive to me than sweet potato fries. In fact, I have made these and sweet potato fries together for supper before and just...completely ignored the main course. These are the best. Sesame oil.
Moving on.
That mulberry cobbler we (okay, you) made at Mom's a while back was really good, but it did not get the need for Grandma's house blackberry cobbler out of my system. I've had her recipe in my book for years. Like, a decade, actually. And I'd never made it before. Blackberries used to be out of my budget, but I recently found that I can buy them cheap-ish in the freezer section. GREAT VALUE BRAND. Yep. So I bought a couple bags and went for it.
GRANDMA-STYLE BLACKBERRY COBBLER
1 stick butter, softened
1 cup sugar
1 cup flour
2 cups (or so) blackberries
That's it. I used frozen blackberries, so I dumped them in a baking dish and warmed them up in the oven to thaw them before I put the topping on.
While they were thawing, I softened the butter a little in the microwave (like 15 seconds) and dumped it in a big bowl. Then I squished in the flour and sugar. It makes a gooey, sticky, crumbly, lumpy dough-type...situation. Very messy. Anyway, you crumble this over the blackberries and bake it at 350 for...let's say 35 minutes. I baked mine longer, because I kept waiting for the topping to get brown or crunchy or something. It didn't.
I don't know why it didn't, or if it's even supposed to? It's been THAT long since I've had Grandma's cobbler. I don't even remember what it's like.
Anyway, I was disappointed. I thought I screwed it up somehow, or I didn't have a complete recipe. Something didn't seem right to me. But I scooped some into a bowl and ate it warm out of the oven with a little dollop of vanilla ice cream anyway.
I did not screw it up! It tasted exactly as good as I remembered! It's the juicy kind of cobbler, maybe not your thing. But the juicy berry goodness, the crunch of the seeds, and the gooey almost-too-sweet dough holding it all together...awesome. Yes. Yay. This is the cobbler I'm sticking with.
I may try a few things in the future with it. I might try cutting the sugar down to 3/4 cup (it was very sweet) or maybe going 1/2 white sugar, 1/2 brown sugar. We'll see. I think I can do some kind of magic to it, I'm just not sure what yet.
Mashed Potatoes and Carrot Cake (not together, that's gross)
Alright, good morning! A couple posts ago, Emmy asked for a good mashed potato recipe, so here we go. This is my go-to and the one I like the best:
Mashed Potatoes of the Delicious Variety:
Lots and lots of chicken broth
Some potatoes, cut up into little, mashable pieces.
Half & half or milk, whatever
Butter
Pepper
Put you potatoes into a big old pot and completely cover them with broth. My husband is a mashed potato FIEND so I usually make a big ol’ pot and it takes a lot of broth. Bring it to a boil. Reduce the heat to medium and cover, cook for about 10 minutes or until the potatoes are soft enough for mashing. Drain your pot, but keep the broth! Mmmm.
Mash your taters! Go on, put some elbow into it. Throw in your butter (however much, y’all are smart people) and start pouring in the milk and the broth until the potatoes are as creamy as you like. Pepper it and I guess if you want, add some garlic, too! Hell, add some cheese and green onions. Add whatever you want! These are your potatoes. And they are awesome.
Grandma Vern’s Carrot Cake:
Cake:
1 3/4 c sugar
1 ¼ cup cooking oil
4 eggs
2 cups flour
1 tsp salt
2 tsp baking soda
2 tsp cinnamon
3 c. shredded carrots
1 c. pecans
Frosting:
1 package cream cheese
1 box powdered sugar
Ok, so this cake. Before I get started…Dad really wanted this cake. Dad has been bugging me FOREVER to make this stupid cake (only without pecan shells, har har). Mom dug up the recipe and what I typed up there is EXACTLY what is on the worn piece of paper she handed me. That’s it. Pretty much the same dilemma I faced with Grandma Rhea’s zucchini bread – here’s all the stuff, but now what?
Well, I pulled out two of my cookbooks (Mrs. Mary Bobo’s and Southern Cakes) to see what I could find. I compared the recipes and aside from some variations in measurements, the only main difference was that the other recipes called for some of the sugar to be brown sugar and they added vanilla extract. I decided to stick with Grandma’s ingredients, and go with Mary Bobo’s instructions. Which I’m going to type here. From memory. So, make at your own risk? (P.S. I’m aware there are TON of variations on a carrot cake that include raisins and canned pineapple and applesauce, etc. I’m a purist.)
Mix your sugar and oil together…for awhile? Until well mixed? Until creamy? Whatever, just mix them up. Mix in the eggs one at a time.
In a separate bowl, sift together all of your dry ingredients (I actually ran out of cinnamon while making this, so I threw in some nutmeg to make up for the maybe ½ tsp of cinnamon I was missing – nutmeg makes EVERYTHING better, in my opinion. Except maybe like, tacos). Mix it in gradually to your egg/oil/sugar mixture. When it’s all done, mix in your carrots and pecans.
I baked it in two 8” pie pans at 350 for about 50 minutes. The recipe said 45 minutes but mine wasn’t quite done.
The icing is pretty simple…again, in the recipe books they both called for additions like vanilla extract and I think one said something else I can’t remember. Anyway, mix your sugar and your softened cream cheese and you are done! I ended up adding a lot more powdered sugar…the icing seemed slippery to me and I hate hate hate icing slipping off of a cake. Just keep adding until it’s at the consistency you want.
I will say that mom said it’s the best carrot cake she’s ever had and I believe (maybe I dreamed this part) that dad told me it was better than Grandma’s. That’s what I’m talking about, bitches. Better than grandma!
Subscribe to:
Posts (Atom)